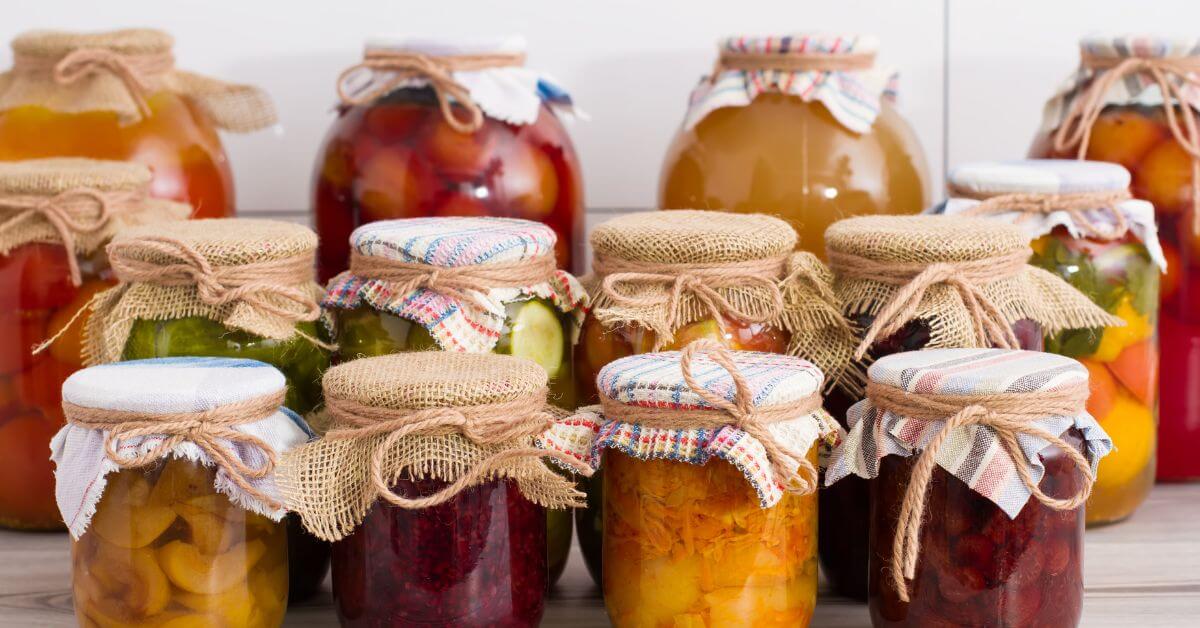
If you’ve ever wanted to preserve fresh, seasonal flavors to enjoy all year long, learning how to can is one of the most rewarding kitchen skills you can master. From sweet strawberry jam to garden-fresh green beans, canning allows you to stock your pantry, reduce food waste, and save money.
In this complete beginner-friendly guide, we’re covering everything you need to know about canning fruits, vegetables, jams, and jellies—including the different methods, essential tools, safety tips, and what foods are best for canning.
This post may contain affiliate links. If you click on one of our affiliate links and make a purchase, We may receive a commission at no additional cost to you. We only share products and recommendations we believe may be helpful to our readers.
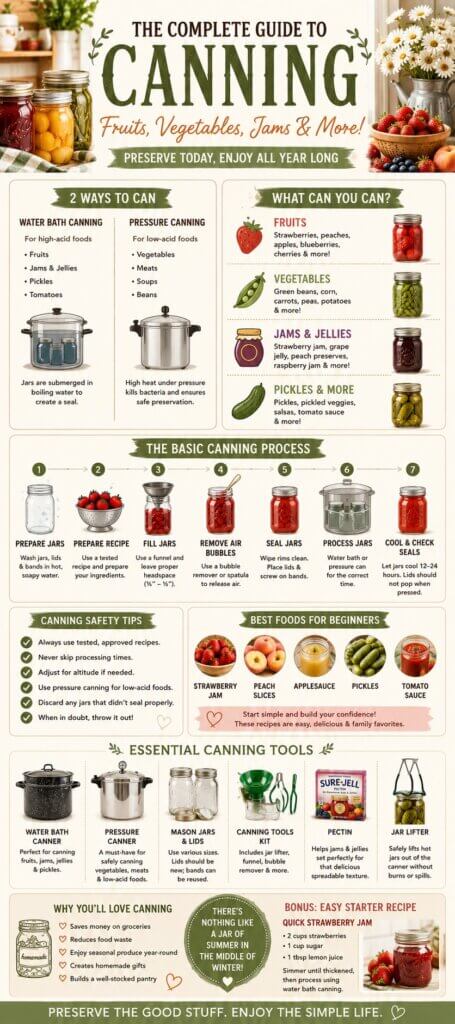
What Is Canning?
Canning is a method of food preservation that uses heat to seal food in airtight jars. This process kills bacteria, yeast, and mold while preventing new microorganisms from entering—making your food shelf-stable for months (or even years).
There are two main types of canning:
1. Water Bath Canning
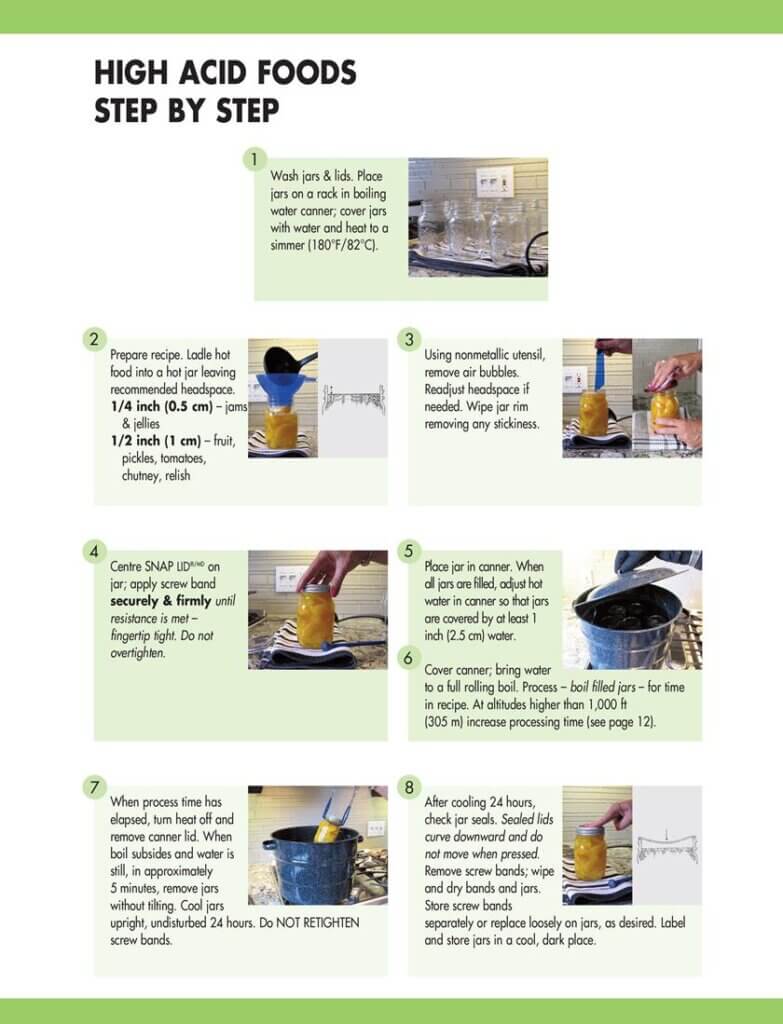
This method is best for high-acid foods, including:
- Fruits
- Jams & jellies
- Pickles
- Tomatoes (with added acid)
Jars are submerged in boiling water to create a seal.
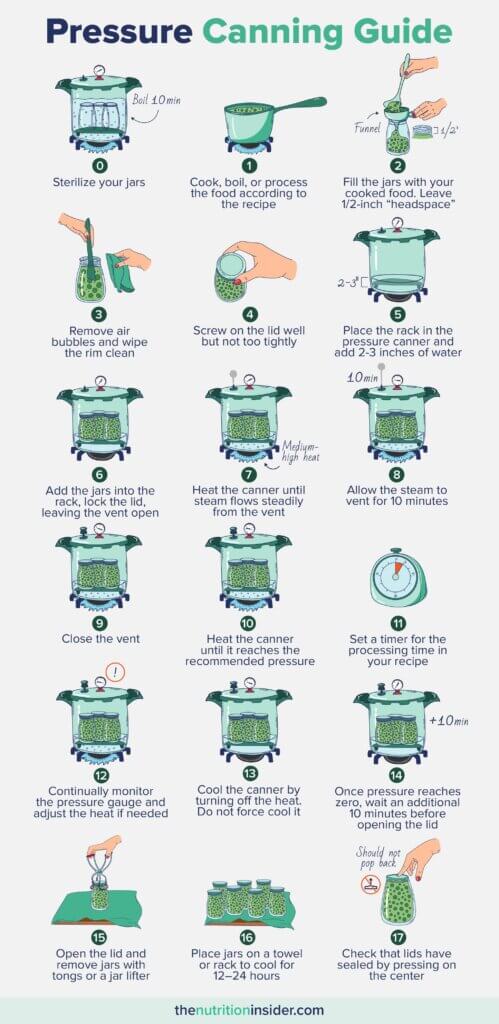
2. Pressure Canning
This method is required for low-acid foods, including:
- Vegetables
- Meats
- Soups
- Beans
Pressure canning uses high heat under pressure to safely eliminate harmful bacteria like botulism.
Essential Canning Supplies
Before you get started, you’ll need a few key tools:
- Mason jars (various sizes)
- Lids and bands
- Large pot or water bath canner
- Pressure canner (for low-acid foods)
- Jar lifter
- Funnel
- Bubble remover or spatula
- Clean towels
Having the right tools makes the process smoother—and safer.
What Can You Can?
One of the best parts of canning is the variety of foods you can preserve. Here’s a breakdown:
Fruits (Perfect for Beginners)
Fruits are naturally high in acid, making them ideal for water bath canning.
Popular options:
- Strawberries
- Peaches
- Apples
- Blueberries
- Cherries
You can preserve fruits as:
- Whole or sliced in syrup
- Fruit sauces
- Pie fillings
Vegetables (Require Pressure Canning)
Low-acid vegetables must be pressure canned to ensure safety.
Best vegetables for canning:
- Green beans
- Corn
- Carrots
- Potatoes
- Peas
Tip: Always follow tested recipes for processing times and pressure levels.
Jams & Jellies
These are some of the most popular and beginner-friendly canning recipes.
- Jam: Made with crushed fruit
- Jelly: Made with fruit juice
- Preserves: Larger chunks of fruit
Common flavors:
- Strawberry jam
- Grape jelly
- Peach preserves
- Raspberry jam
Pectin is often used to help achieve that perfect gel consistency.
Pickles & Fermented Foods
Pickling is another great way to preserve vegetables.
- Cucumbers → pickles
- Carrots → pickled sticks
- Onions → pickled slices
These are processed using water bath canning due to added vinegar (acid).
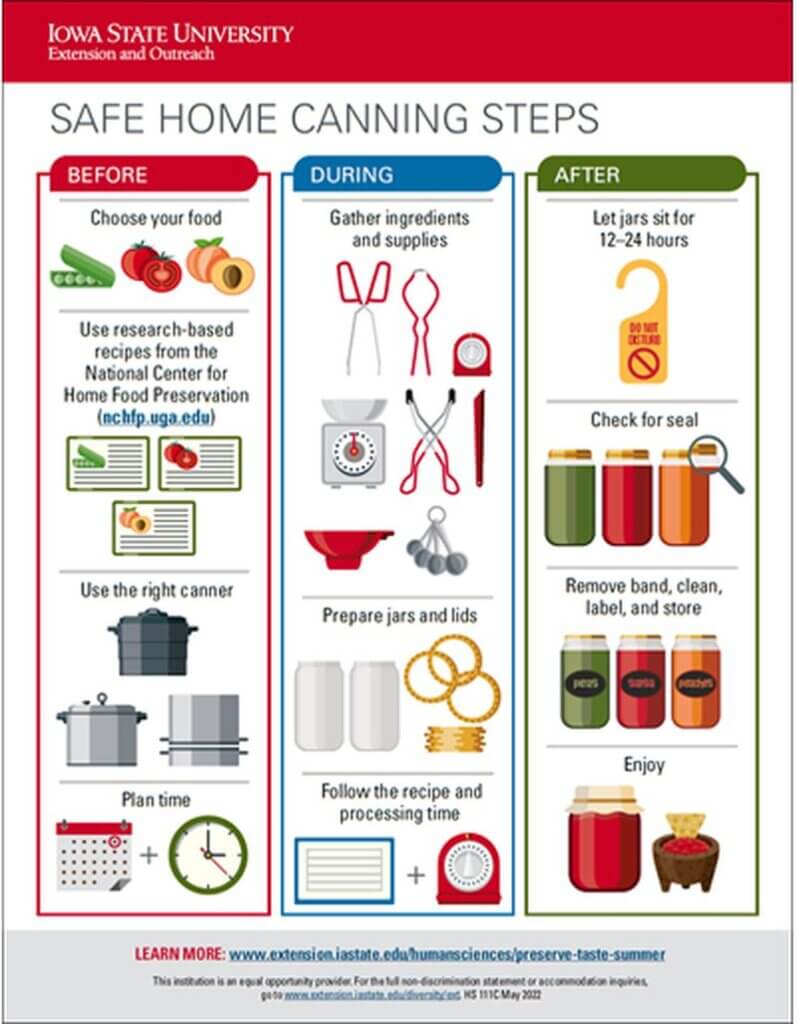
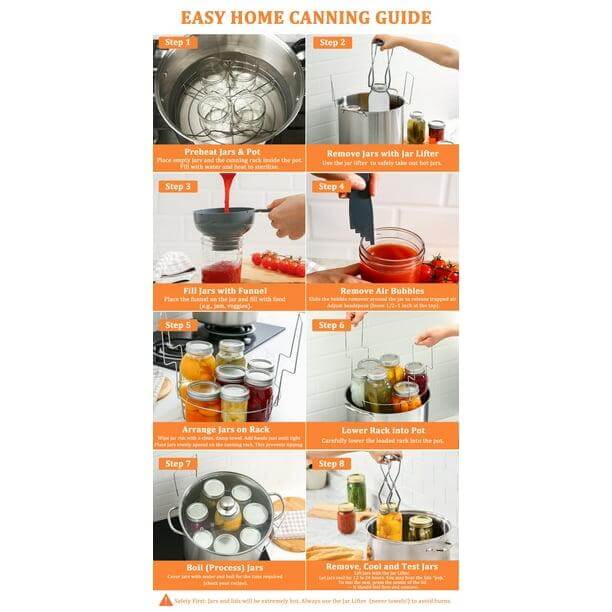
Step-by-Step: How to Can (Basic Process)
Here’s a simple overview of the canning process:
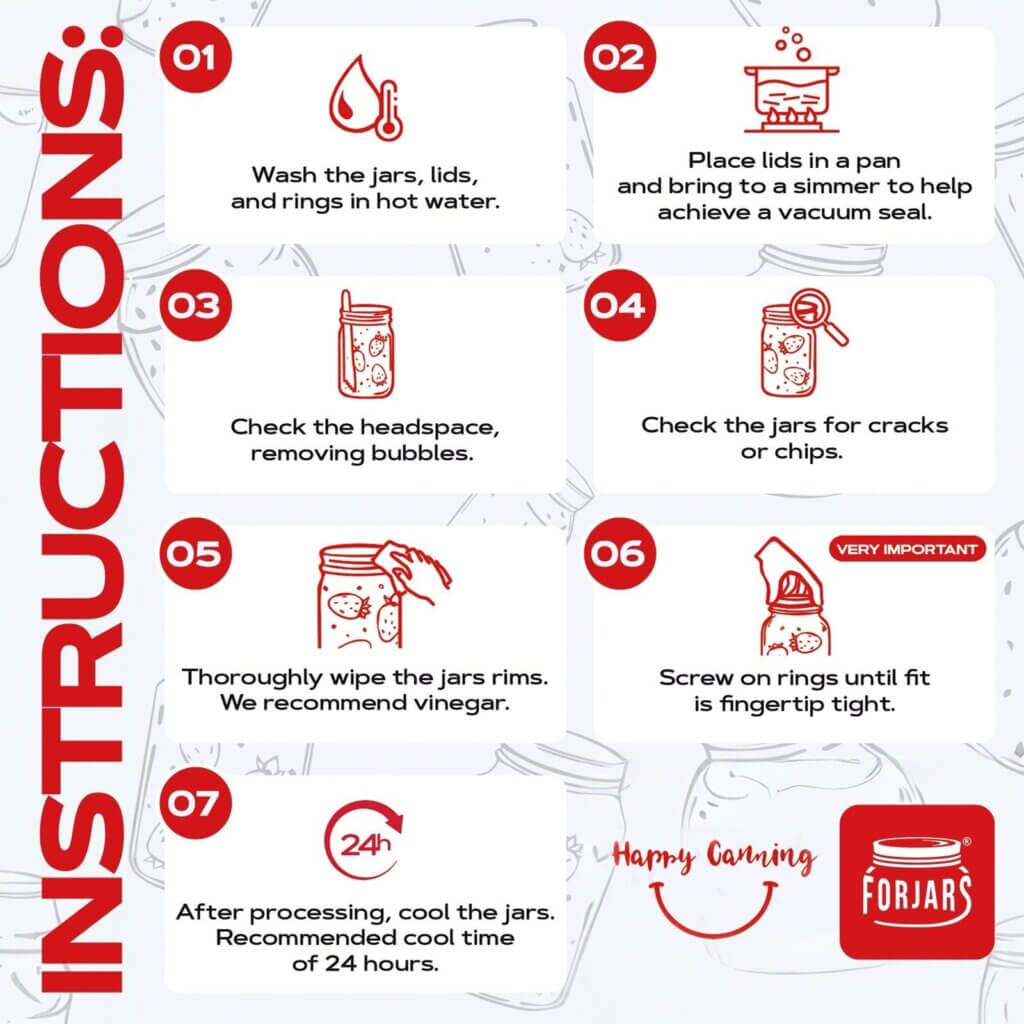
- Prepare Your Jars
Wash jars, lids, and bands in hot soapy water. - Prepare Your Recipe
Follow a tested recipe exactly for safety. - Fill the Jars
Use a funnel and leave proper headspace (usually ¼–½ inch). - Remove Air Bubbles
Use a spatula or bubble remover. - Seal the Jars
Wipe rims clean and apply lids and bands.
Process the Jars
- Water bath: boil for designated time
- Pressure canner: process at correct pressure
Cool & Check Seals
Let jars cool undisturbed for 12–24 hours. Lids should not pop when pressed.
Canning Safety Tips (Very Important!)
Canning is safe when done correctly—but it’s important to follow guidelines:
- Always use tested recipes
- Never skip processing times
- Adjust for altitude if needed
- Use pressure canning for low-acid foods
- Discard any jars that didn’t seal properly
- When in doubt, throw it out
Best Foods to Start Canning (Beginner Picks)
If you’re new to canning, start simple:
- Strawberry jam
- Peach slices
- Applesauce
- Pickles
- Tomato sauce
These recipes are forgiving and great for building confidence.
Why You’ll Love Canning
Canning isn’t just practical—it’s incredibly rewarding.
- Saves money on groceries
- Reduces food waste
- Lets you enjoy seasonal produce year-round
- Creates thoughtful homemade gifts
- Builds a well-stocked pantry
There’s something so satisfying about hearing that “pop” as your jars seal!
Final Thoughts
Whether you’re preserving fresh summer berries or stocking up on pantry staples, canning is a timeless kitchen skill worth learning. Start small, follow safe methods, and before you know it—you’ll have a pantry full of homemade goodness.
Ready to get started? Grab your jars and let’s make something delicious!
This post may contain affiliate links. If you click on one of our affiliate links and make a purchase, We may receive a commission at no additional cost to you. We only share products and recommendations we believe may be helpful to our readers.
Bonus: Easy Starter Recipe Idea
Quick Strawberry Jam (No Pectin Option)
- 2 cups strawberries
- 1 cup sugar
- 1 tbsp lemon juice
Simmer until thickened, then process using water bath canning.
Your future self will thank you when you open a jar of summer in the middle of winter ❤️
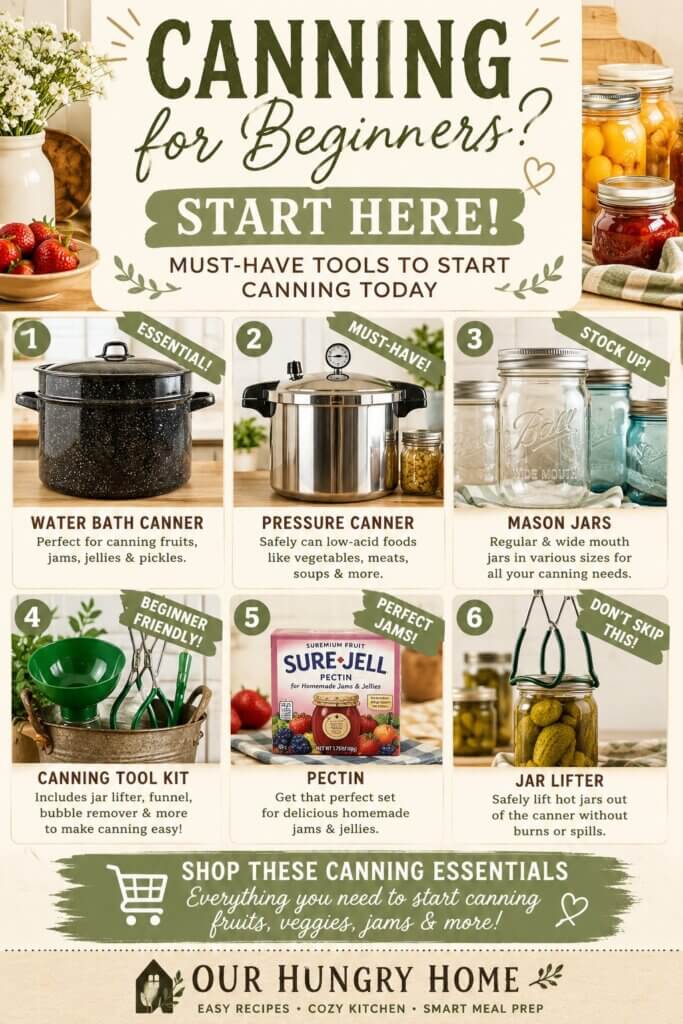
Shop This Post: Canning Essentials You’ll Love
Ready to start canning? These are the tried-and-true tools that make the process easier, safer, and way more enjoyable—whether you’re making your first batch of strawberry jam or stocking your pantry for the year.
Must-Have Canning Tools
- Water Bath Canner
Perfect for beginners and essential for canning fruits, jams, jellies, and pickles. This large pot allows you to safely process jars and achieve that perfect seal. - Pressure Canner
A must-have for safely preserving vegetables, meats, and low-acid foods. If you plan to can pantry staples like green beans or soups, this is non-negotiable. - Mason Jars (Regular & Wide Mouth)
Stock up on a variety of sizes for everything from jams to sauces. Wide-mouth jars are especially great for beginners and bulkier foods. - Canning Lids & Bands
Lids should always be new for proper sealing, while bands can be reused. Keep extras on hand—you’ll go through them quickly! - Jar Lifter
Safely remove hot jars from boiling water without spills or burns (trust me—you’ll use this every single time). - Canning Funnel
Makes filling jars clean and easy—no sticky mess, no wasted food. - Bubble Remover / Headspace Tool
Helps release trapped air and ensures proper headspace for safe sealing. - Pectin (for Jams & Jellies)
Essential for achieving that perfect thick, spreadable texture in homemade jams and jellies.
Nice-to-Have Upgrades
- Jar Labels or Chalk Markers
Keep your pantry organized and cute (perfect for gifting too!) - Magnetic Lid Lifter
A small but super helpful tool for grabbing lids from hot water. - Canning Rack
Keeps jars from touching the bottom of the pot and ensures even processing.
💡 Pro Tip
Start with the basics and build your collection over time. If you’re brand new, a simple starter kit + water bath canner is all you need to begin making jams, jellies, and pickles right away!